stampa con la macchina per la pasta(tutorial)
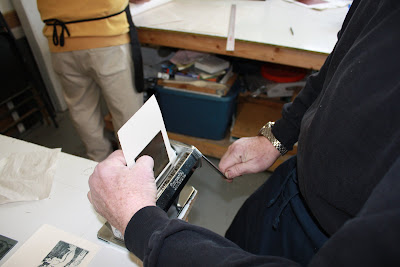
Our instructor, Julian Cox, who is an artist, printmaker, and director of One Horse Press(the printmaking department of Evanston Art Center), has lived and worked in the Chicago area for the past 20 years. He teaches printmaking classes at One Horse Press and the Lillstreet Art Center. Today, he demonstrated printing with a hand-cranked pasta machine. He suspects he may be the very first person to have ever printed with a pasta machine.
Printing with a Pasta Machinehttp://happyfaceschicago.blogspot.it/2009/03/printmaking-process-pasta-machine.html
- Materials:
- Hand-cranked pasta machine (Imperia brand or whatever is available)
- Soft, resilient printmaking paper (Graphic Chemical heavyweight paper or Rives BFK), measuring about 4¾ inches by 5½ inches
- Felt pad, 1/16 inch (obtained from a printmaking supplier or a felt blanket used under a Christmas tree)
- Etching ink (tube of Renaissance Black Etching Ink or similar ink obtained from a printmaking supplier)
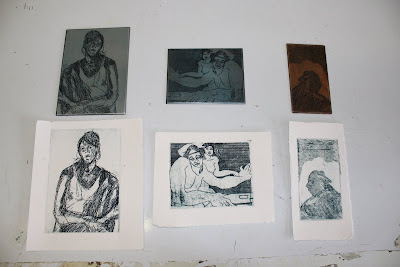
- Several small etched plates that will fit in your pasta machine (about 2½ inches long by 3 inches wide). Copper or zinc plates are generally used.
- Steps:
1. Tear paper to the correct size and soak in water for at least 10 minutes.
2. Crank the felt about 1 inch into the machine.
3. To test embossment, set the machine to No. 3 to start. Put the etched plate on top of a piece of dry paper, and then put the layers on the felt (plate facing you) and run them through the machine. Push the layers through the rollers with one hand as you crank the machine.

Crank the machine and start feeding the end with
the plate closer to one end of the paper.
Push the layers down with your other hand.
4. Once the desired embossment is achieved, ink and wipe your etching plate, and blot the printing paper.
5. Repeat the process of feeding the layers of plate (image side down, plate facing you, and closer to one end of the paper)and blotted paper through the machine.
6. Tear off any excess paper. The printed image can be dried between sheets of paper with a weight on top so the print dries flat.


Thanks for sharing this useful content. Paranobio provide organic and nutritional hazelnuts in italy
RispondiEliminaVendita nocciole online